$64.00
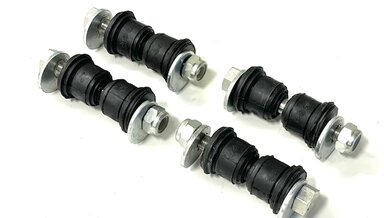
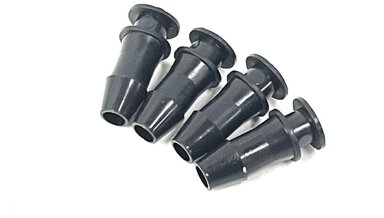
R107 W114 W115 Front LOWER Control Arm Inner Bushing Repair Kit
Both left and right side lower arms.
This is a great kit for your 350SL, 450SL, 450SLC, 380SLC, 380SL, and 560SL from 1972 to 1989.
Kent's Factory Service Manuals collection is going on sale now. CLICK HERE.
This is a great kit for your 350SL, 450SL, 450SLC, 380SLC, 380SL, and 560SL from 1972 to 1989.
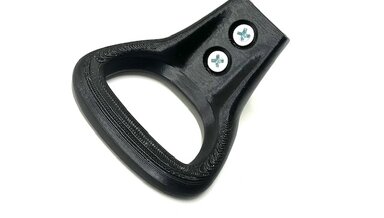
If your front seat fore and aft adjustment handle is cracked or broken, we have the right replacement upgrade for you, which is stronger and more comfortable to pull on. This is a beginner DIY job on most seats. You cut and chisel the old handle off and bolt on this new handle.
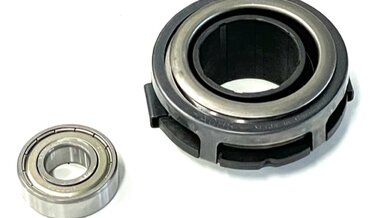
If your clutch is making growling noise when you push the pedal in these are the parts you need to fix it. You might want to consider replacing the pressure plate and disc while you have the transmission out.

This procedure is a must do anytime you install a new master cylinder or allow fluid to completely leak out of your master cylinder.
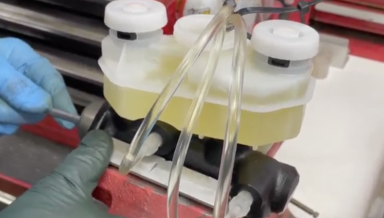
In this 30 minute instructional video Kent will use a 1972 300SEL 4.5 to show you how to remove the master cylinder with minimal spillage, how to install the tank and bench bleed a new master cylinder, and how to reinstall it with minimal brake fluid spillage while protecting your car's paint.
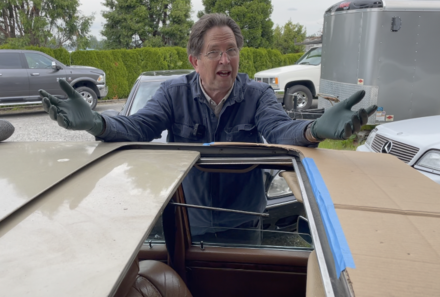
Are you dealing with any of these sunroof problems? Stuck roof, broken drive gears, bad cable, no lubrication, broken slides, headliner panel coming apart, installation problems, alignment, slow movement, headliner jamming, roof panel sits too low, and clutch spinning or not adjusted properly.
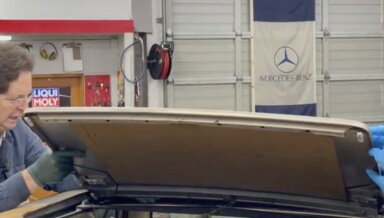
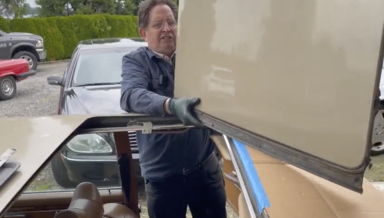
In this 20-minute instructional video, Kent will walk you through the steps of getting the steel sunroof panel installed properly back into the car's roof. The first step will require cleaning, inspection, and possible replacement of the plastic slides.
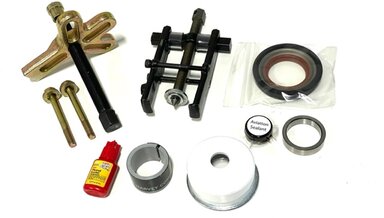
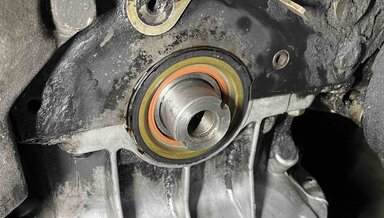
Includes Kent's four detailed videos on every aspect of this job! This is our combination kit for DIY installation of a new front crank seal in an OM 616 four-cylinder and OM617 five-cylinder NON-turbo diesel engine. The price if purchased individually is $174.00.
In this 13 minute instructional video Kent will show you how to clean your sunroof cable tube, prep your cable for easy installation, lube the cable during installation, show preliminary clutch adjustement, and demonstrate how to get cable to engage the drive assembly using the power switch.

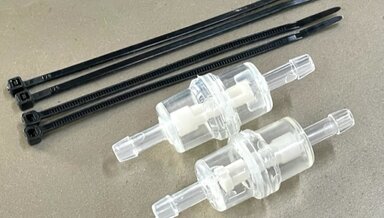
This can do amazing things for your new fuel hose installaton on your old Benz engine. Watch the video to learn more. Sold individually in approximately 6 inch lengths.
In this 14 minute instructional video, Kent will share with you the tools you will need along with some tips and tricks that will help you successfully remove a prechamber from the cylinder head. This can be done with the head on or off the engine.
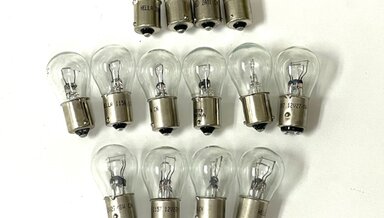
Assortment includes 6 single-element brake and turn signal bulbs, 4 dual-element bulbs for the front marker lights, and 4 small tail light bulbs. Good idea to carry this assortment in the trunk of your car.
We modify this wrench right here in our shop. If a picture is worth a thousand words, what is a video work. Watch the following for a full explanation.
Contamintion in the window washer fluid tank is one of the main reasons the spray nozzles get plugged up. Install this little fitler somewhere in the line between the pump and the nozzles on the hood and secure with zip ties.
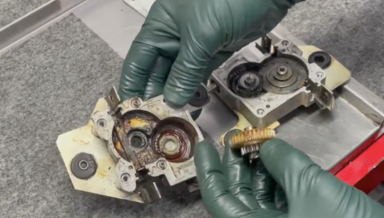
The sunroof transmission drive unit moves the cable back and forth to open and close the sunroof. There are 5 gears inside this unit that transfer the incoming drive from the motor ( high speed) to the final drive moving the cable (slow speed).
In part one Kent will show you how to get all the sunroof parts off our old Mercedes and on a bench particularly if you sunroof is broken and not moving. In this 21 minute instructional video here is a list of the subjects he covers:
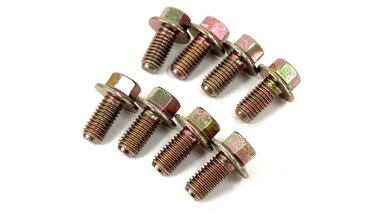
These are very high quality bolts. Same 8mm thread and small 10mm head as the originals. 8 is enough for two front seats.
This is a sample of the nut plate they go into on the back attach point on the W123 front seats.
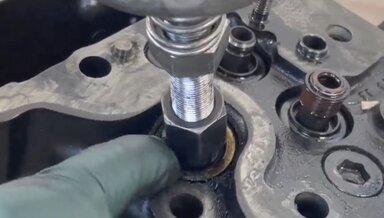
This custom-made thin head wrench by Kent Bergsma can save the day and your pocketbook. It is very important that you hold the fitting base on the oil cooler when removing the oil cooler hoses. A regular 22mm wrench is almost always too thick and can also cause damage.
In this detailed 30-minute video Kent will walk you through the process of installing new tie rod ends on his 1959 Mercedes 220SE. The principles are the same on almost all models from the 1950s up to the 1990s. He will explain the differences in adjustment between the older and newer styles
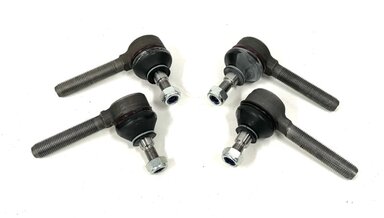
Loose steering or wheels shaking at speed. This can often be worn out tie rod ball joints. The joints can be replaced as a DIY project. Watch the video below to see if this is something you want to take on yourself.
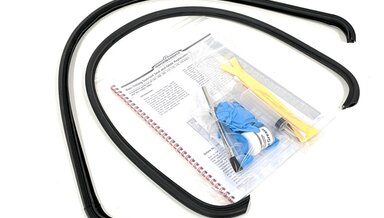
This kit includes:
These have been inspected for good hex heads and for abnormal thread stretch. Threads will need cleaning before installation. Always use liberal blue thread locker when installing.
You would be amazed at how much fuel can leak out of a fuel hose when you disconnect it from your tank or engine. This is an easy way to prevent messy spills.
This is a great solution to what is sometimes a nagging problem. This heavy duty and flexible and adjustable plastic spacer can be put on the top or bottom radiator to prevent chafing in and area where it might come in contact the the engine or the radiator.
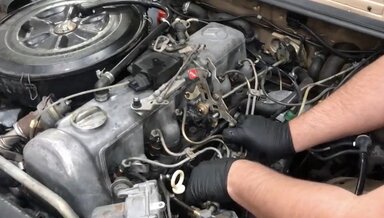
When “rebuilding” an old Bosch mechanical fuel injector, replacing the nozzle is usually enough get it working again at peak performance. But sometimes you will run into a fuel injector that just won't fire right nor product a correct fan spray pattern.
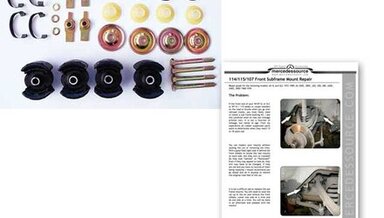
If the front end of your W 114 or W115 sedan or coupe wanders on the road or thunks when you go over railroad tracks, you most likely need to install a new front subframe bushing kit. I see this condition even on real low mileage pristine cars.
Version 4 update 2/22: New color and style but still does the same job. This is one of the key tools you will need to remove stubborn pre chambers from the cylinder head of your old diesel engine.
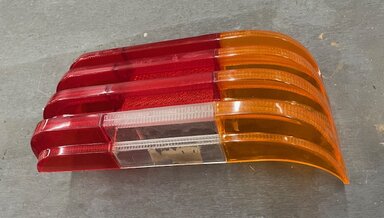
Very good right lens as shown. Outer plastic lens only. No breaks, lines, or crazing.
For years I just used old shop rags to catch the drips - until I found this! What a great solution. Watch the video below for more details
Tightens and Removes Collar Nuts on 220D 240D 300D 300CD 300TD 300SD 300SDL 190D 2.2 1969 to 1987. Works on most Mercedes diesel engines up through 1987 only.
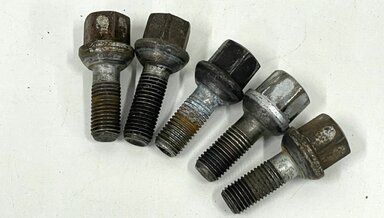
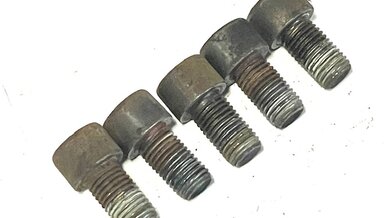
Fits all Mercedes models with the 14" Alloy bundt cake style wheels. The measurements are M12x1.5mm by 51mm overall length. This is a set of five USED wheel bolts that are not all rusty.
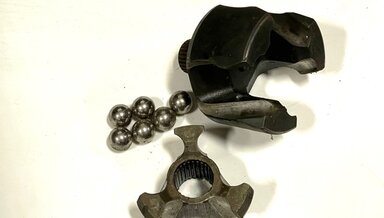
If you need some good rear axle spare parts here is your chance.

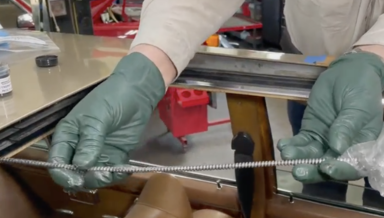
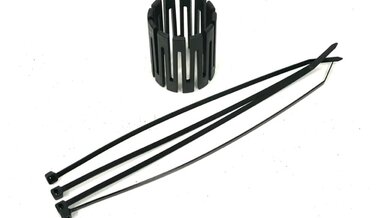
We starting using some of these to plug brake lines while changing out calipers. Then we started using them on fuel and oil hoses. Now we are using them all over the place and keep finding new uses for them on a monthly basis. These are a MUST HAVE! Watch the video below to become a believer!
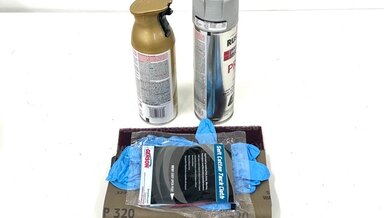
Cad plating can be expensive but is great for show restorations. If you just want to make those parts on your old Benz look good then this is the closest paint Kent has found to looking like cadmium gold plating. Check out the pictures below of the fuel delivery brackets he did with this paint.
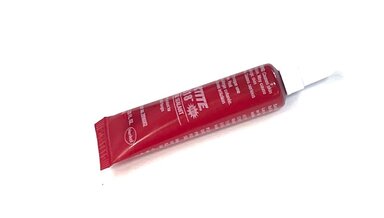
Here is my all-time favorite gasket maker and sealant. You may already know how I feel about RTV silicone products (I think they should be outlawed!). We have had a number of our customers ask us where to get this so we decided to offer it on our website.
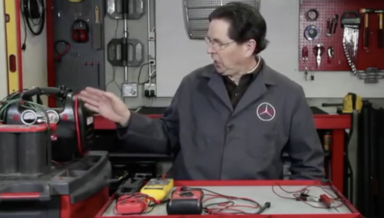
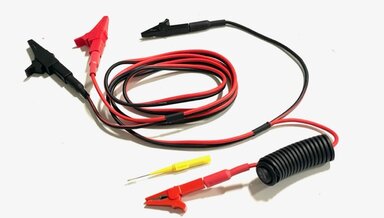
To many people, automotive electrical systems and testing are a big mystery. It is not as complicated as you might think.
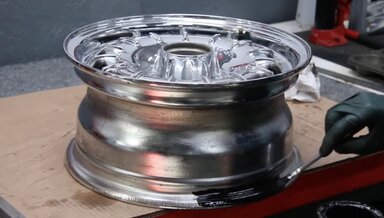
In this video, Kent will show you how he fixed his leaking tires on his chrome alloy wheels by using Miracle Paint. This is a full 22-minute step-by-step instructional video. Watch the video "trailer" below to give you a better understanding of what is involved in this procedure.

This kit was developed by Kent primarily to fix leaking chrome wheels. The free on-demand video that comes with this kit shows the detailed process of cleaning and filling the corroded areas along the edges of the inside of the wheel to seal them and stop annoying tire leaks.
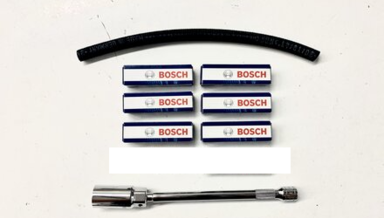
Do not let anyone convince you to install some super platinum, iridium or kryptonite spark plug in your old Benz. They are just not capable of handling the richer fuel mixtures associated with these older engines.
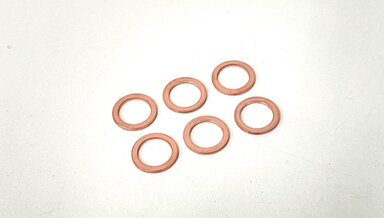
When doing a compression test you must properly seal the inner surface of the pre-chamber with the fuel injector hole adapter. Copper washers work the best for this to ensure a 100 percent seal. Do not use the engine's heat shield washers.
This 25-minute video is a supplement to Kent's other instructions on replacing diesel engine front crank seals. It is offered free of charge with one of the seal replacement kits.
In this video Kent will share some set up tips as well as explain what is in the compression tester and an overview of how it is used.
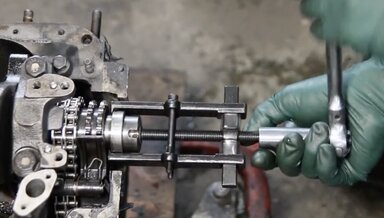
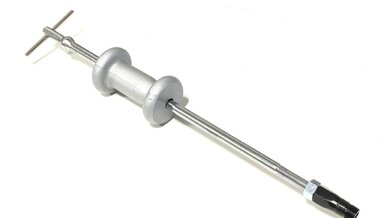
This video will show you how to remove the front crank seal race using the factory tool and using Kent's custom puller. It will also demonstrate a very easy way to install a new replacement race before installing a new seal.
See the related products below to purchase individual seals with tools and Kent's video instrucitions.
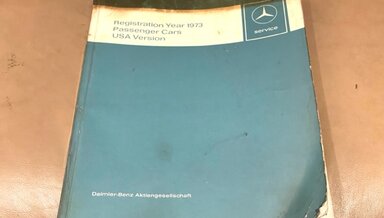
Very Rare. One of the first of these types of manuals released. This introduction manual is intended to familiarize technical personnel with the Registration Year 1973 Passenger Cars vehicles.
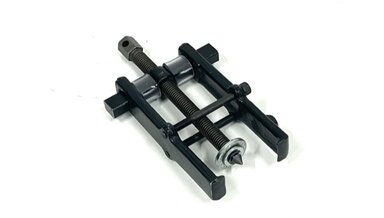
Kent modified this puller and developed a procedure to remove the front crank seal race so the job could be affordable from the DIY mechanic. This costs less than half the cost of the factory tool.
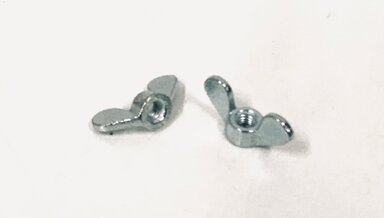
Two new wing nuts. These have wider wings so they are easier to loosen and tighten. Replace the nut that most people install after the wing nut has been lost!
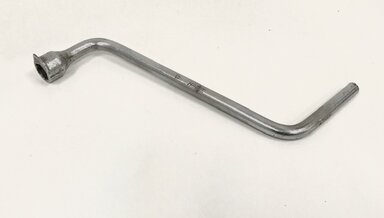
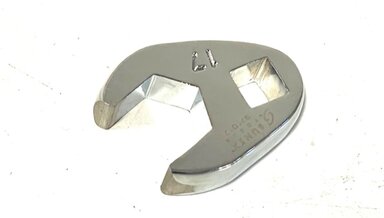
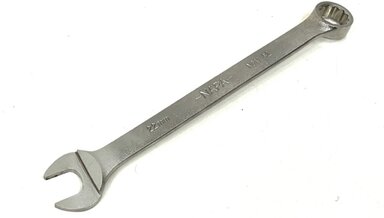
Wheel wrench as shown. For 17mm head bolts. Original. Only one available.
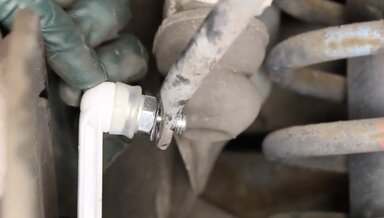
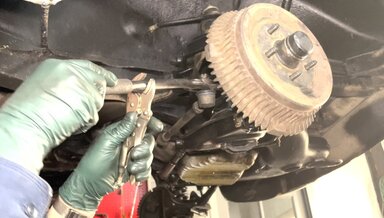
Kent will get right up behind the rear end hub plate and show you close up how to remove and replace a sway bar link. This is not a difficult job especially if you follow the sequence shown in this 7- minute video.
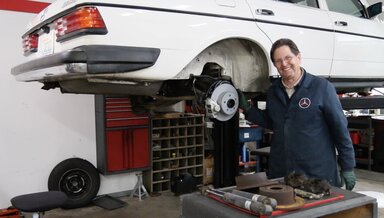
In this 30 minute-long video Kent will walk you through what he did for the rear suspension on his 1983 240D.